Managing GitHub Branch Protections
GitHub has recently improved its automatic pull request handling and branch protection features. I have found these features handy, and nowadays, I enable them regardless of the project type to help me automate the project workflows and protect the code from accidental changes and regression bugs.
The features I find most useful are
- Require a pull request before merging: This setting enforces a model where the developers cannot accidentally push changes to the project’s main branches.
- Require status checks to pass before merging: This branch protection setting allows one to configure which status checks (e.g., unit tests, linting, etc.) must pass before merging the pull request.
- Allow auto-merge: This setting allows me to automate the merging of the PR once all the CI has run all the needed checks. I do not need to wait for the CI to complete the jobs. Instead, I can continue working on other things. In addition, I use this feature to merge, for example, dependency updates automatically. Note: auto-merging works naturally only when the branch protection checks are in place.
Until now, I have used GitHub’s branch protection feature to enable these additional shields. With this settings page, you can easily protect one or multiple branches by configuring the abovementioned options.
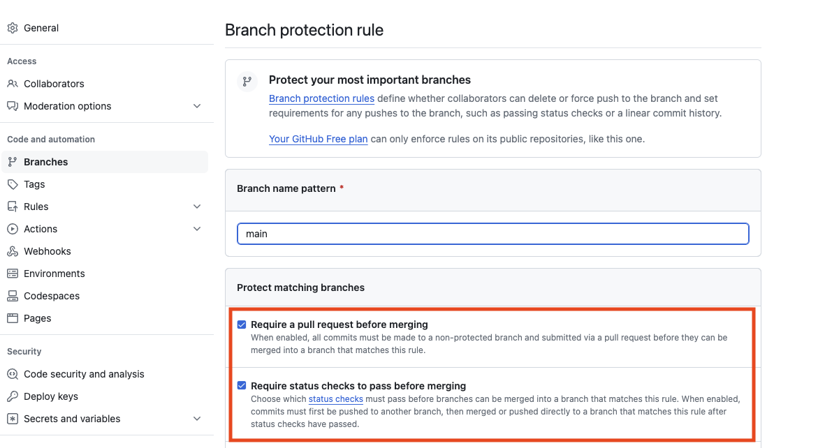
One can configure branch protection rules in the repository settings.
Branch Protection Prevents Releasing
However, when enforcing the branch protection, it applies to all users. That also includes the bot user I am using in many projects to release: creating a release tag, updating version numbers, and committing these changes to the main branch.
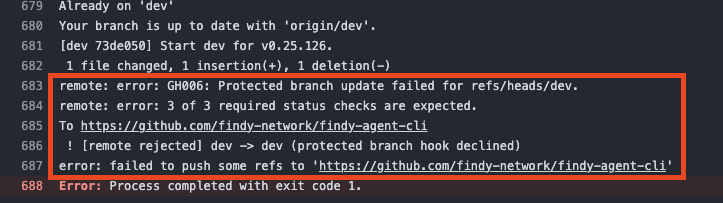
Releaser bot is unable to push version update when branch protection is enabled.
Suddenly, when the branch protection is enabled,
the release bot cannot do its duties as it cannot push to the protected branch.
Error states: Protected branch update failed for refs/heads/<branch_name>, X of X required status checks are expected.
Therefore, to overcome this problem, I have configured the bot to use pull requests. These workaround pull requests have slowed the process and made it unreliable. In some cases, I have been using a user token with administrative permissions to make the releases, which I want to avoid as it has evident problems in the security model.
Rulesets to the Rescue
Finally, this week, I reserved some time to investigate whether it is possible to avoid these limitations. I had two targets: first, I wanted to protect the main branch from accidental pushes so developers could make changes only via pull requests vetted by the CI checks. Second, I wanted the release bot to be able to bypass these rules and push the tags and version changes to the main branch without issues.
I googled for an answer for a fair amount of time. It soon became apparent that many others were struggling with the same problem, but also that GitHub had released a new feature called rulesets, intended to solve the problem. However, a few examples were available, and the configuration of the rulesets was not intuitive. Therefore, I have documented the steps below if you wish to use a similar approach in your project.
The instructions below are three-phased:
- Creating a GitHub application for the release process operations
- Configuring rulesets that protect the main branch but still allow releasing
- Using the newly created GitHub application in the GitHub Actions workflow
GitHub Application
The first step is to create a GitHub application that handles the git operations in the CI release process for you.
Why to Use an Application?
There are multiple reasons why I chose to make a dedicated GitHub application instead of using a personal access token or built-in GitHub Actions token directly:
- The App installed in an organization is not attached to the user’s role or resource access as opposed to the personal access tokens.
- App does not reserve a seat from the organization. Creating an actual new GitHub user would reserve a seat.
- One can grant an application special permissions in rulesets. We want to treat all other (human) users similarly and only grant the bot user special access. This approach is impossible when using personal access tokens or built-in tokens.
- We want to activate other actions from pushes done by the releaser. For instance, if we create a tag with the releaser bot, we want the new tag to trigger several other actions, e.g., the building and packaging the project binary. If using a built-in GitHub Actions token, new workflows would not be triggered, as workflows are not allowed to trigger other workflows.
One can use GitHub Applications for multiple and more powerful purposes, but the releaser bot only needs minimal configuration as its only duty is to do the releasing-related chores.
1. Register Application
Start the application registration via user profile Developer settings or
this link.
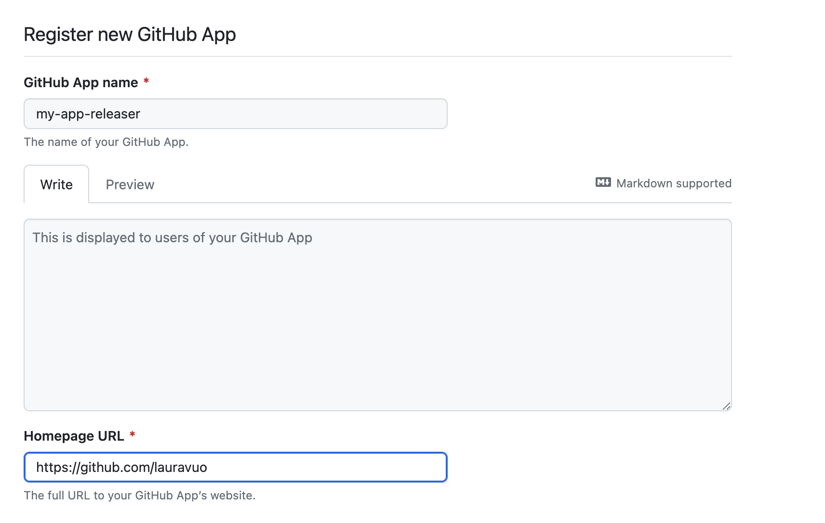
Registering new GitHub application.
When creating the new application for the releasing functionality, the following settings need to be defined:
- Application name: e.g.
releaser-bot - Homepage URL: e.g. the repository URL
- Untick
Webhook/Active, as we don’t need webhook notifications. - Choose permissions:
Permissions/Repository/Contents/Read and write.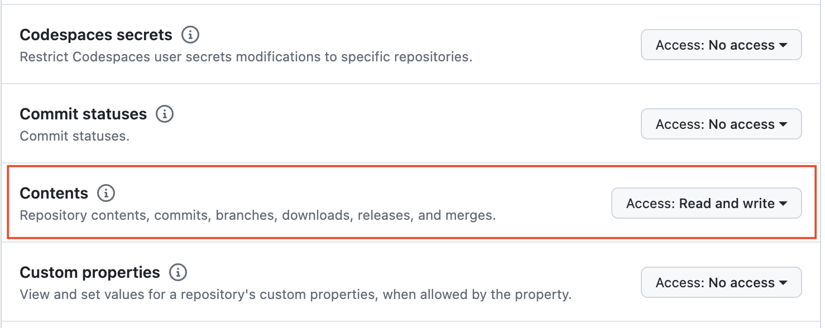
- Choose selection:
Where can this GitHub App be installed?Note: If you want to use the application in an organization’s repositories, make it public. - Push
Create GitHub App.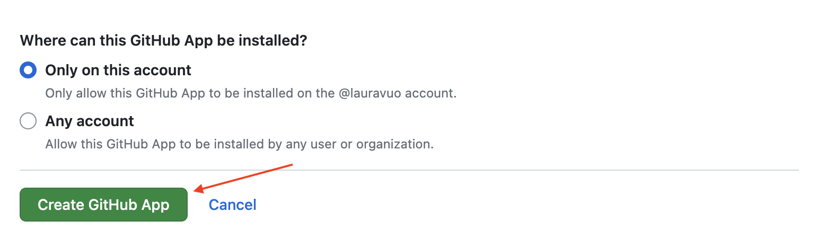
2. Download Private Key
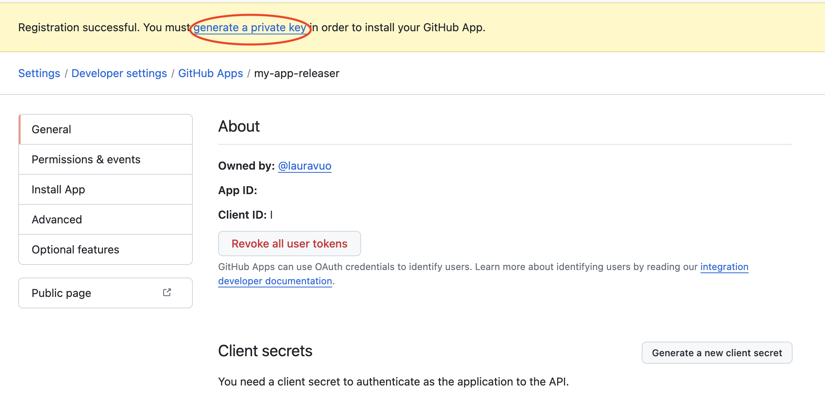
After creating the app, you will receive a note saying,
Registration successful. You must generate a private key to install your GitHub App.
Navigate to the private keys section and push the Generate a private key button.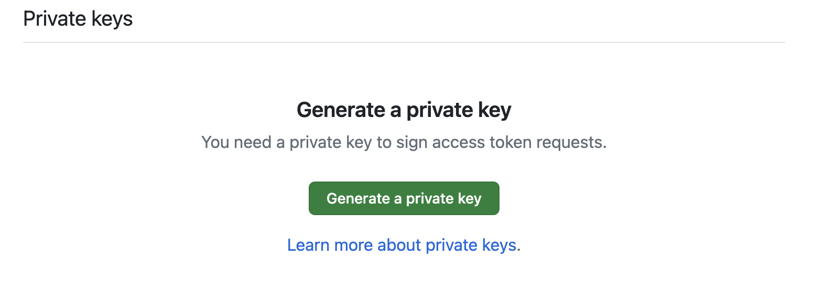
The private key file will download to your computer. Store it in a secure place; you will need it later.
3. Install the Application
Before using the application in your repository’s workflow:
- Install the app in the target repository.
In the created application settings, go to the
Install Appsection. - Select the user or organization for which you want to install the application.
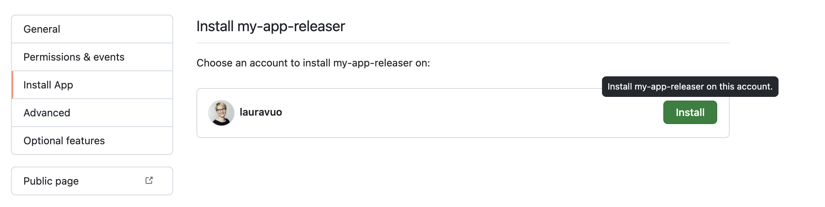
- Select if you wish to use the application in a single repository or all account repositories.
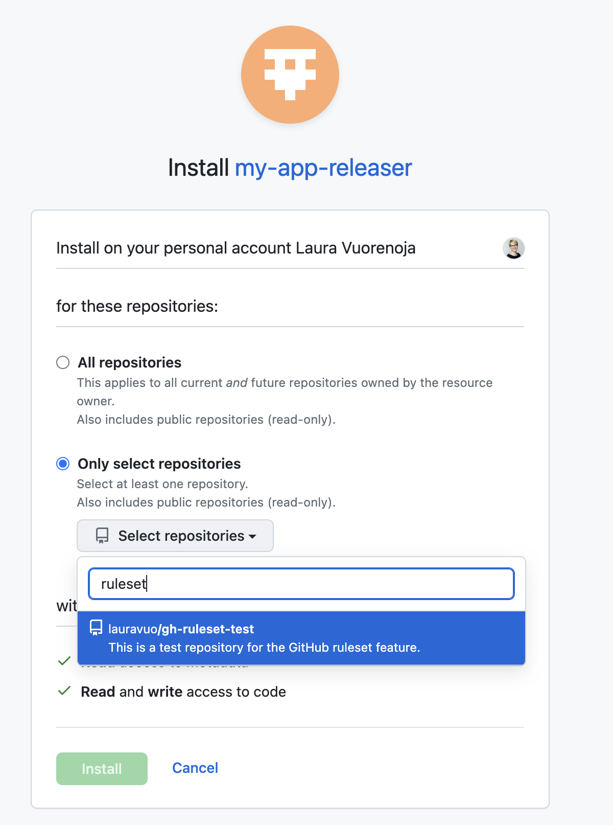
- Push the
Installbutton.
Remove Existing Branch Protections
The rulesets feature will work on behalf of the branch protection settings. To avoid having overlapping configurations, remove first any existing branch protections.
Rulesets
The next step is to create the rulesets.
I crafted the following approach according to the original idea presented in the GitHub blog. The goal is to protect the main branch so that:
- Developers can make changes only via pull requests that have passed the status check
test. - The releaser bot can push tags and update versions in the GitHub Actions workflow directly to the main branch without creating pull requests.
You may modify the settings according to your needs. For instance, you may require additional status checks or require a review of the PR before one can merge it into the main branch.
Configuration
First, we will create a rule for all users. We do not allow anyone to delete refs or force push changes.
Go to the repository settings and select Rulesets:
- Create a
New rulesetby tapping theNew branch ruleset. - Give the
Main: allname for the ruleset. - Set
Enforcement statusasActive.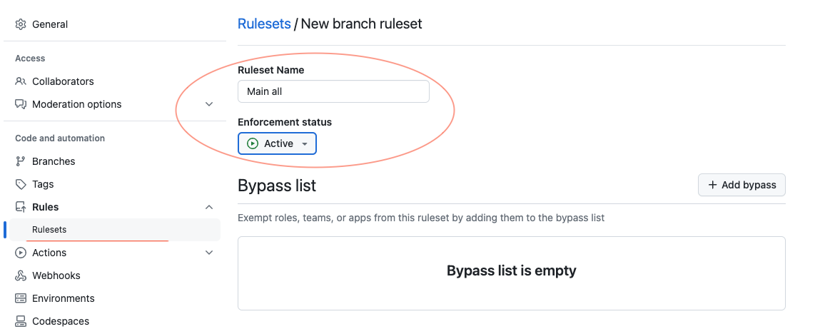
- Leave
Bypass listempty. - Add a new target branch.
Include default branch(assuming the repository default branch is main).
- In
Rulessection, tickRestrict deletionsandBlock force pushes.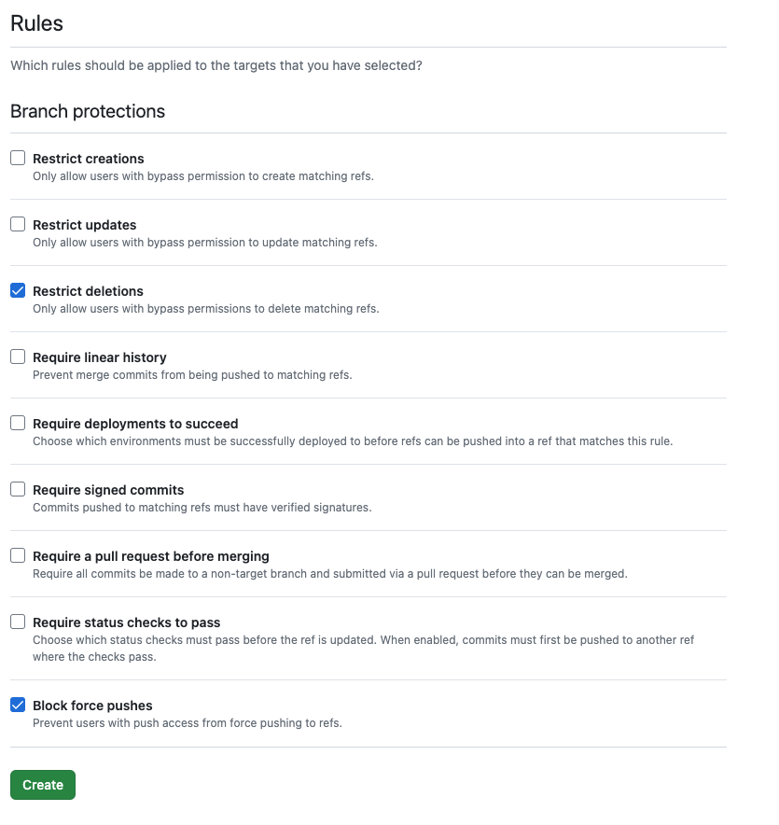
- Push the
Createbutton.
Then, we will create another ruleset that requires PRs and status checks for any user other than the releaser bot.
- Create a
New rulesetby tapping theNew branch ruleset. - Give the
Main: require PR except for releasername for the ruleset. - Set
Enforcementstatus asActive. - Add your releaser application to the
Bypass list.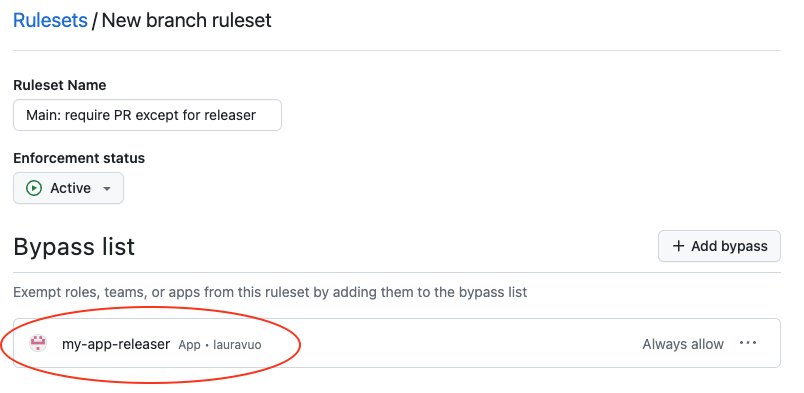
- Add a new target branch.
Include default branch(assuming the repository default branch is main). - Tick
Require a pull request before merging.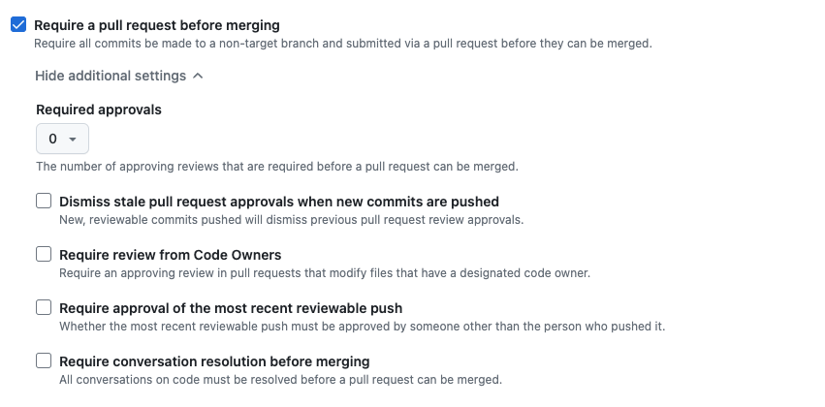
- Tick
Require status checks to passandRequire branches to be up to date before merging.Addtestas a required status check.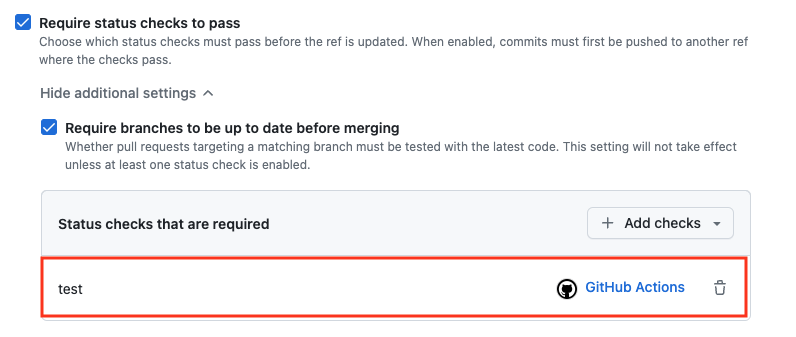
- Push the
Createbutton.
Use Bot in GitHub Actions Workflow
The final step is configuring the release process to use our newly created GitHub application.
Add Secrets for Release Workflow
To create a token for the releaser bot in the GitHub Actions workflow, we must have two secret variables available.
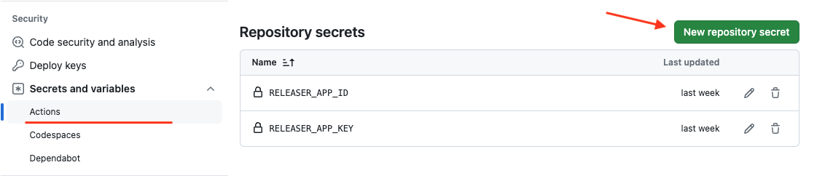
Go to repository Settings / Secrets and variables / Actions. Create two new secrets:
RELEASER_APP_ID: Copy and paste your GitHub application ID (app ID) from the GitHub application settings page.RELEASER_APP_KEY: Copy and paste the contents of the private key file downloaded earlier.
Generate Token with the GitHub Application
In the release workflow, generate a token with the GitHub Application.
For this, you can use a special action, actions/create-github-app-token,
that utilizes the secrets defined in the previous step.
You can use the generated token for the repository cloning step. One can access the token using the outputs of the token generation step. Since the repository gets cloned with the bot token, the bot user will perform subsequent git actions.
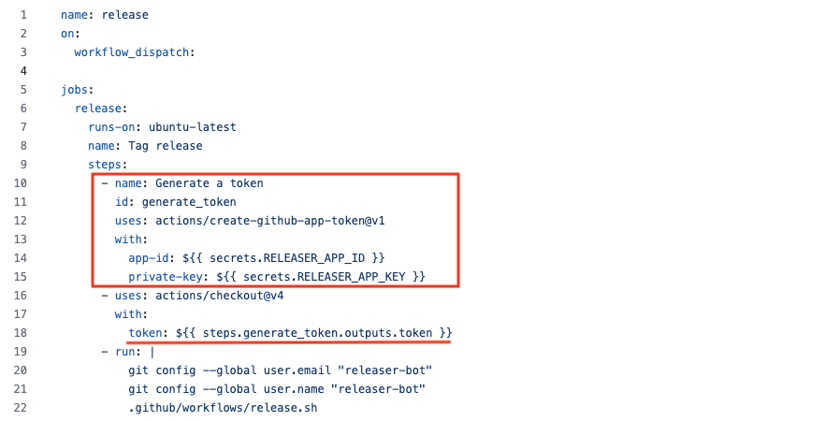
You can find the sample workflow in GitHub.
So, the release script can now push directly to the main branch as we use the releaser bot token and have configured a bypass rule for the bot user in the rulesets. At the same time, other users cannot push to the main branch but must create a PR for their changes.
Summary
That’s it! The above steps show how to automate project release workflow in GitHub Actions with a dedicated bot user while still having repository branch protections to shield from accidental changes and unvetted code. I hope the instructions are of use to you. I’m always happy to have comments and ideas for improvement; you can contact me on LinkedIn!
